Disclosure: This content may contain affiliate links. Read my disclosure policy.
Camping in the Catskills
Camping in the Catskills is the best, of course, but here’s how you can seriously level up your camping experience — camp out in the backcountry, primitive style, among the high peaks.
This comprehensive list of resources, regulations and gear will help get you ready for your first Catskills backcountry campout.
Solo or Group?
If you want to camp out in the backcountry, it’s probably because you want to get away from the public and private campgrounds, and experience the wilderness in a heightened state of fear and resilience!
This article focuses on solo campouts, to date, because that’s been my experience.
Soloing an expedition into the backcountry is intimidating. In some ways, it’s quite a bit more taxing than being in a group, mostly because there’s no-one else to share the load.
For solo backpackers, there are also a few elevated safety risks to think about. (As a straight, white, middle-aged male, I know I write from a place of considerable privilege.)
But there are also real benefits to going it alone.
Soloing tests and increases your resilience, your strength and your courage, as well as your knowledge and skills. It’s challenging, sure, but it’s such a wonderful, rewarding and personally deep experience.
You do everything yourself: researching locations, lugging gear, setting up camp, feeding yourself two hot meals, staying warm and dry, and experiencing a night in the wilderness on your own terms.
On the other hand, if you’re planning a group campout — yay! — super fun times.
Either way, this article covers all the basics:
- planning
- gear
- food
- water
- safety
Quick Safety Reminder
As with any wilderness hike, you should always let a loved one, or a reliable friend, know your plans.
Your emergency contact should have your planned locations, routes and timings, and the correct emergency number to call in case you do not make contact by your specified time.
Where to Camp in the Catskills
One of the best ways to find good campsite locations is to simply pour over the NYNJTC Catskills Maps looking for primitive campsite icons, as well as icons for lean-to shelters and public campgrounds.
It’s so important to be able to read contour maps, to understand the terrain you’ll be entering — and this is an extremely pleasant way to practice that skill.
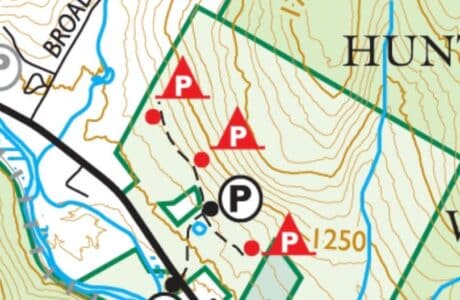
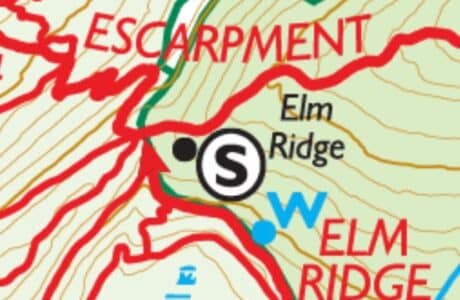

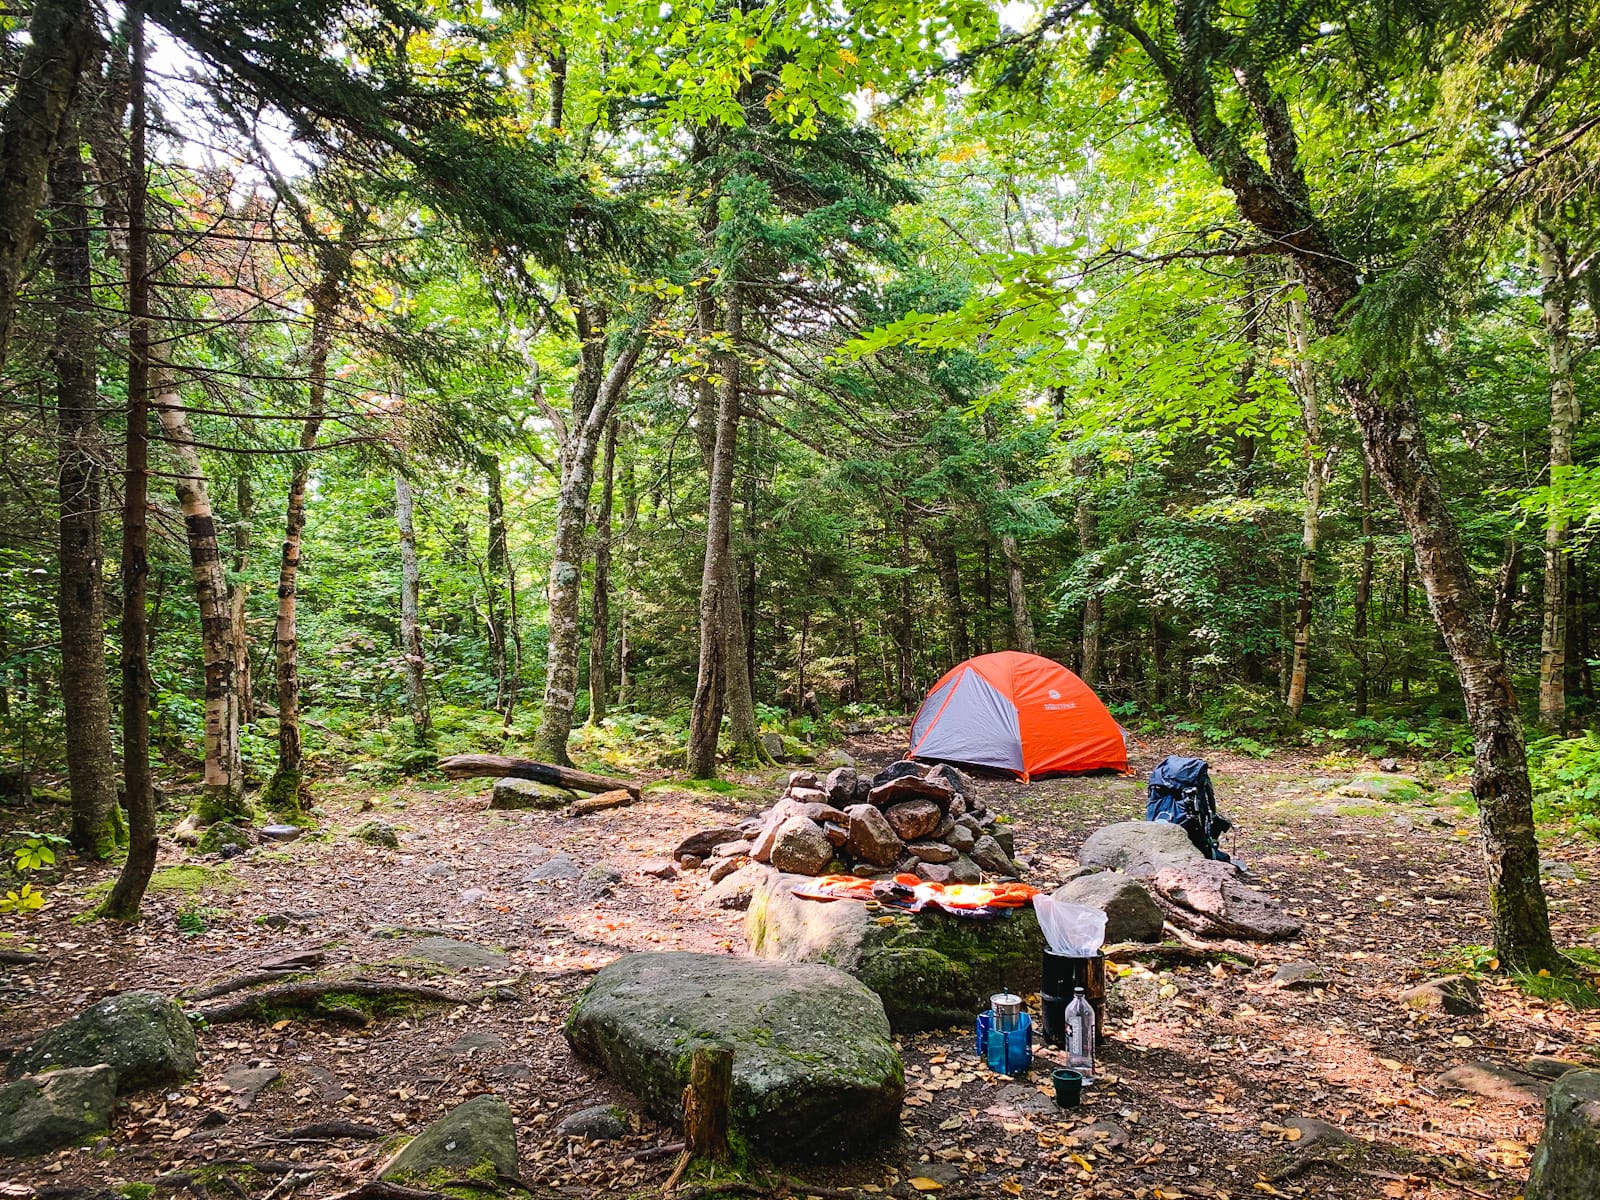
Primitive camp sites are often the best places to camp. They’re definitely the best spots for your first overnight backcountry campout.
Designated campsites are typically flatter than other areas. They have deeper, harder soils which are more resistant to heavy use and erosion, which minimizes the impacts of camping.
Many sites have nearby pit privies and rock fire rings.
All designated primitive tent sites have yellow and black “Camp Here” markers.
Designated tent sites tend to be close to trails and often provide views of ponds, lakes, streams or rivers — which can be a source of water when properly treated (see below).
Consider Distance From Trailhead
My full solo overnight kit weighs over 40lbs (18Kg). That includes my tent, my sleep system, and all the food and water I’ll need for one night away.
I recently camped out in the col between Slide Mountain and Cornell Mountain. From the west side of Slide to camp, it was four long-ass miles and, reader, I felt those 40lbs. Totally worth it, mind you — but for my next few campouts I’ll be choosing sites closer to my car.
As it happens, many campsites in the Catskills are located within a mile or two of a trailhead.
Time Your Arrival
Setting up camp and cooking in the dark sucks, so make sure you leave enough time to get to camp well before sundown.
Plan to arrive 1-2 hours before sunset. That will give you time to explore, to relax, to forage for firewood, to set up camp, and to cook dinner.
Also allow for a slower pace on your hike in. With all that extra weight on my back, I hike about 25% slower than on a typical day hike.
Catskills Backcountry Camping Rules & Guidelines
Camping in the Catskills is heavily regulated and regularly policed. There are a handful rules to be aware of…
- Backcountry camping is allowed year-round on state forest preserve lands at designated sites
- You must camp below 3500 ft – above that level, the flora is super sensitive to foot traffic
- You can camp above 3500 ft in winter — but only do so if there’s a thick covering of snow on the ground
- If you want to camp away from a designated site, you must camp at least 150 ft from any road or trail as well as at least 150 ft from any water body or source — any brook, stream, pond, lake, or spring
- Tents are not allowed inside lean-tos — they must be at least 150 ft from a lean-to
- Campfires are allowed below 3500 feet in elevation (use only dead or downed wood, do not cut or break living wood) — fires above 3500 are illegal and extremely risky for our summits
- Camping out for more than three nights, or in groups larger than nine, requires a permit
- To get all the details read the DEC’s Catskill Backcountry Information page
Camping Etiquette
Black bears are present throughout the Catskills so you should always store your food, toiletries and garbage in a bear-resistant canister or a bear hang.
Be aware that your toothpaste smells as interesting to a bear as a jar of peanut butter.
Your food, toiletries and garbage should be kept at least 150 ft from your tent or hammock.
Lean-tos are available on a first-come/first-serve basis and cannot be reserved. Lean-tos should be shared by multiple parties until filled to capacity (normally eight people) — a rare situation, but it can happen in heavily-used locations.
It’s proper etiquette to share your tent site for one night if a second camper or group of campers arrives after dark, especially when it is raining, cold or windy. In the morning, the second group should pack up and leave to look for another location.
Weather Concerns
I’m not experienced enough to handle any kind of severe weather while camping. I think I could handle some rain, but I don‘t want to. I’ve camped out in windy situations but it makes me nervous; I’ve yet to learn how to guyline my tent properly.
I’ve also yet to camp in the snow. I’m keen to do it. To that end, earlier this year I built a small wooden platform in my back yard (to counteract the rather annoying slope we have there). I’ll do a trial run this winter.
During my planning phase, I check the local weather reports carefully — and a lot — and make sure the odds are always well in my favor. Basically, where I‘m at right now, I’m just trying to set myself up for success.
I am always prepared to decamp and bail, if need be.
What to Bring on Your Campout
I’m refining my list as I learn more. The following is what I currently take with me on overnight campouts in the Catskills.
These items are in addition to the ten essentials and my normal day hiking kit.
Tent / Rainfly / Poles / Pegs — or a hammock
There’s a lot of discussion online about camping out with tents versus hammocks. I know hammocks have their benefits but, for now, I’m a tent person. I like how simple tents are to set up, and the space and privacy they provide.
I like the feeling of a small dry room I can sit up in. And I went with a two person tent because I like the idea of sharing it with family. As a camping noob, I felt like a tent would give me the most bang for my buck right now.
- Darwin onthetrail (who makes fantastic hiking videos) has a great comparison video that walks you through the pros and cons of tents vs hammocks
My tent is a Marmot Tungsten 2-Person Tent, which is very roomy and, at apx 5lbs, not too heavy.
I’m not a camping minimalist, or an ultralight backpacker, and this tent is nowhere near those low-weight tolerances. If I was going on a long solo thru-hike, I’d definitely look at switching down to a more minimal one-person system to cut weight.
The Tungsten 2-Person tent (this one is quite similar) is big enough to keep my backpack/gear inside and still have lots of room. There are also two vestibules, one on either side, for leaving stinky or bulky items outside while keeping everything protected from rain.
The tent also comes with its own correctly-sized footprint, which keeps water from seeping in from below.
Nice touches: reflective flags make the tent easy to spot at night; lampshade pocket where you can stash a light source; two interior pockets for small storage; ceiling clip for hanging stuff.
One negative: the tent pegs that come with this tent are not great — they bent when I used them — so I picked up some stronger ones from Amazon; those turned out to be a few ounces lighter too.
Most importantly, however, this model is extremely easy and quick to set up. I can get my basic camp up and running in a matter of minutes.
Camp Out Sleep System
My sleep system is made of four items: a sleeping bag, two mattress layers (one foam, one inflatable), and a pillow.
My sleeping bag is a Marmot Trestles 30 Mummy Sleeping Bag which is rated down to 30°F (-1°C). I haven’t slept out below freezing yet but I did camp out recently at 40° (4°C) and I was plenty warm.
Again, this is not the lightest or most minimal sleeping bag but I think it’s a very good three-season sleeping bag, with potential (for me) to push things down below freezing.
This is an area where you’ll have to do a lot of personal research. So much is dependent on your own preferences for materials, weight, style, and how hot you sleep. I sleep hot — even in winter, at home, I sleep under one sheet and one blanket; I prefer to be cooler rather than warmer.
Underneath, my base layer for sleeping on is a Therm-a-Rest Z Lite Sol sleeping pad which is fairly standard-issue these days. This is a closed-cell foam pad, aka a “CCF sleeping pad”. You sleep on it with the silver side up, so it reflects your own body heat back to you.
On top of the foam pad, I layer a basic air mattress (an Outdoorsman Lab air mattress) which takes less than ten breaths to inflate.
The foam pad is very bulky and needs to be attached to the outside of your backpack. The inflatable mattress packs down pretty small and doesn’t weigh much.
Stacking Your Mattresses
This combination is surprisingly warm but, once again, there’s plenty of discussion online, in this case about whether or not the inflatable should be stacked on top of, or underneath, the foam pad.
I come down on the side of keeping the foam pad below, mostly because doing so reduces the chance of anything puncturing the inflatable layer.
I wondered if it might be slightly warmer to keep the reflective pad closer to my skin, but guess what: on a cold night in the woods, for me, the foam-below/inflatable-above configuration was plenty warm.
Opinions here are basically religious. There is no compelling science to help you make a clear call.
Pillow Talk
Whether or not you pack a pillow is another personal choice. Some people just use a bundle of clothes. Whatever works.
I have an inflatable backpacking pillow like this one. It took a little getting used to — sleeping on a basically weightless pillow feels weird at first, but now I like it a lot and it helps me sleep soundly.
Bear Canister vs Bear Hang
There are an estimated 3000 bears in the Catskills. FWIW, I’ve been hiking regularly here since 2018 and I still haven’t seen one. I know plenty of way more experienced hikers and campers and many of them have, at most, one or two stories of a bear encounter.
Typically, by the time a bear is spotted, it’s already running away. Bears don’t like people — which is exactly the way we like it.
If you abide by a few simple rules, you’ll minimize your chance of a bear encounter.
Many people do a bear hang. I did a PCT-style bear hang with a dry sack for my first Catskills campout. But it can be difficult to do a bear hang quickly and well — or correctly at all — in the Catskills.
In the Adirondacks, bear canisters are mandatory. In the Catskills, I feel they should be recommended.
Bears might roll a canister around but they’ll quickly abandon it, understanding they can’t crack it open.
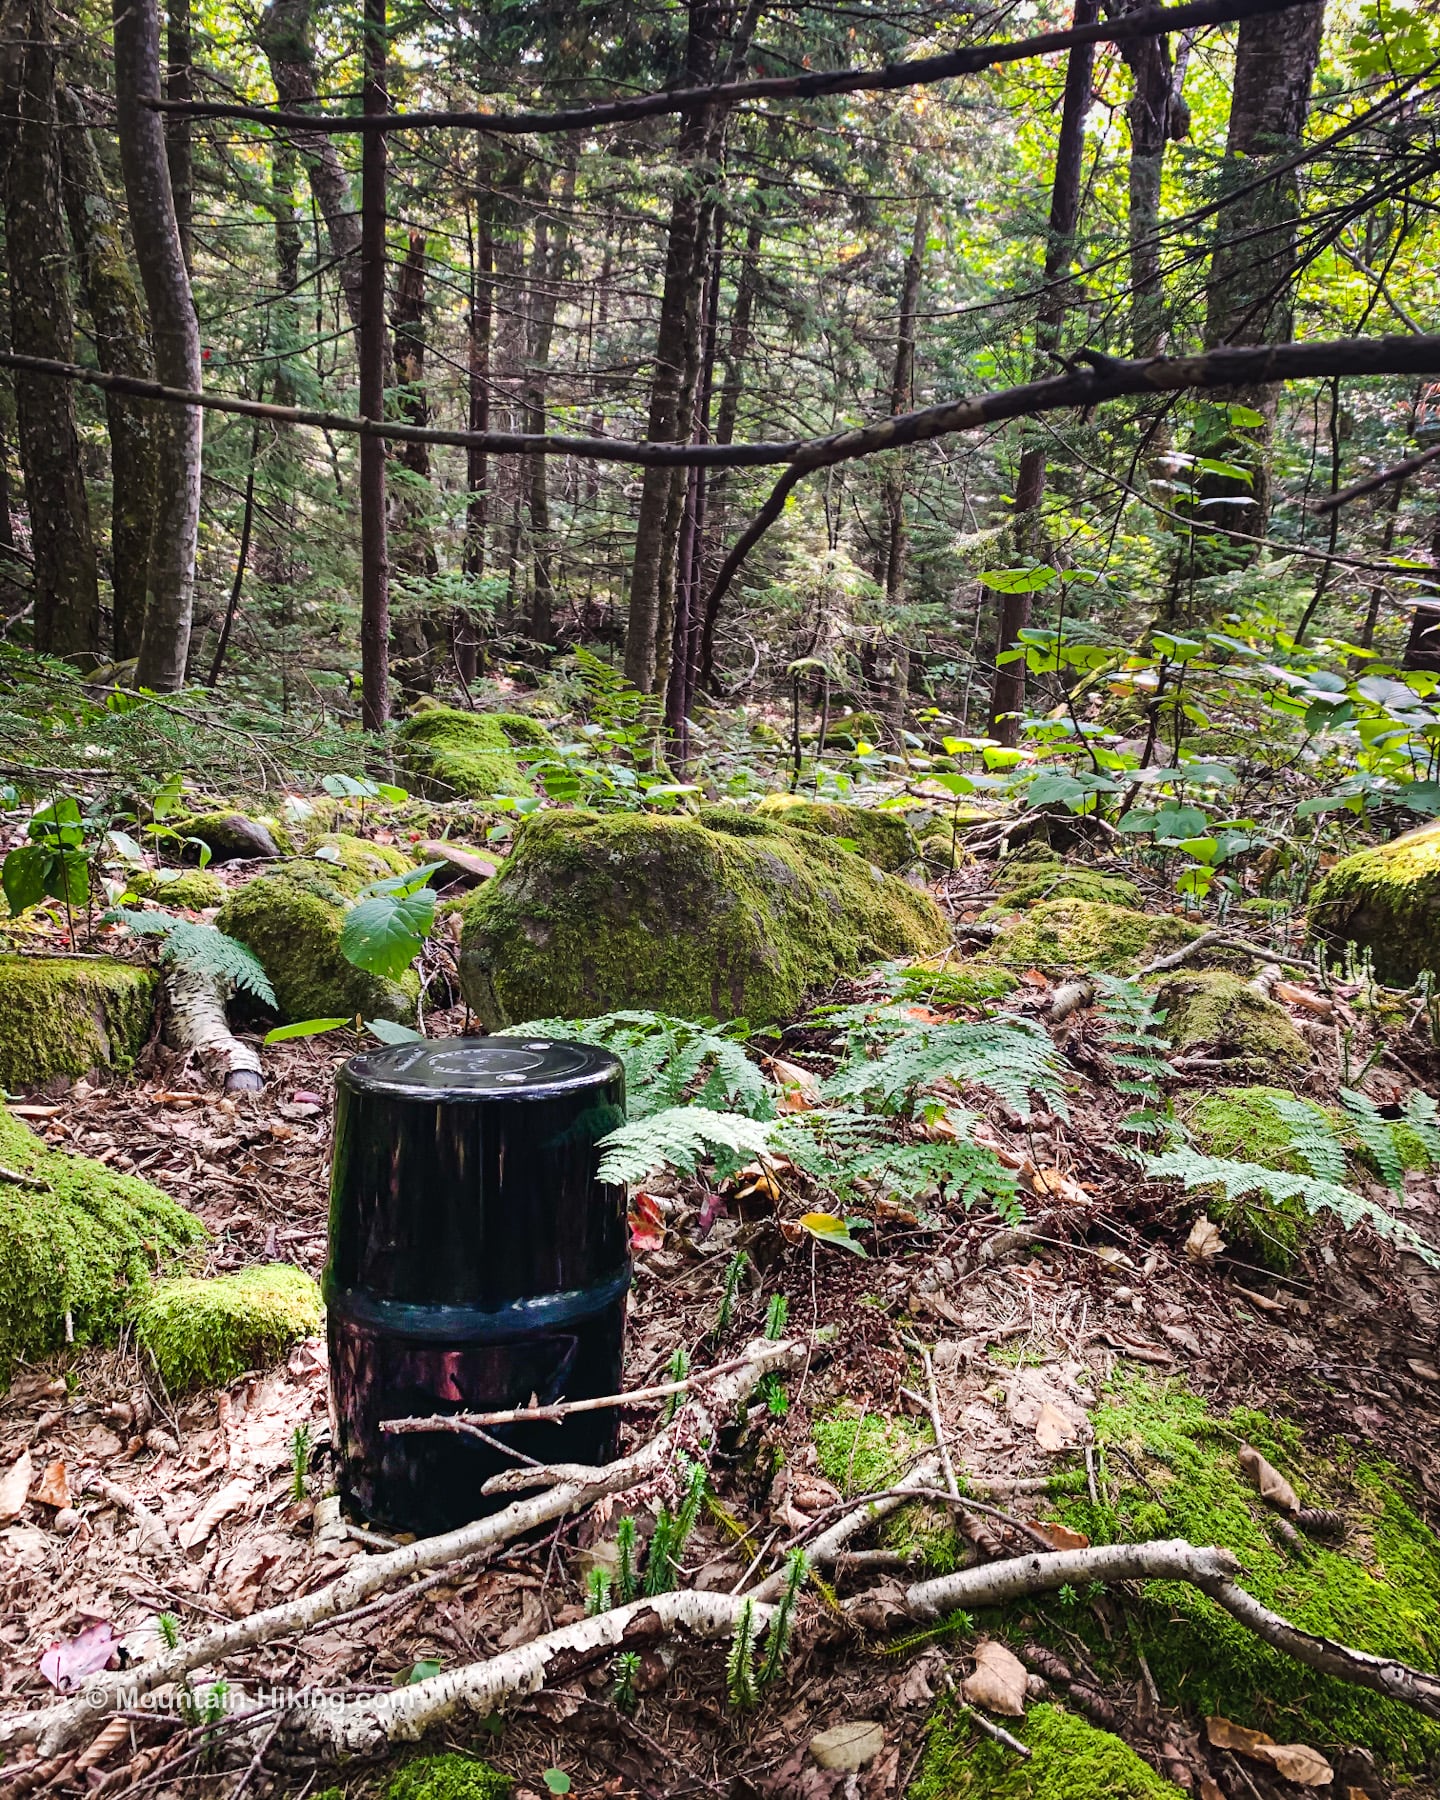
Note: do not buy the clear blue plastic canisters you’ll find on Amazon. Bears can rip those open easily. Get a thick black heavy bear-resistant canister, as recommended by the DEC. I have one very like this one from Amazon, and a carry bag, too.
I brought my canister on a campout between Slide and Cornell. Yes, they’re heavier and bulkier, but they’re so convenient. You don’t waste any time doing a bear hang. And they’re sturdy enough that they do double-duty as a camp stool.
A canister is also a great place to store delicate food items on your hike in. If you fall or trip, the canister will protect your snacks!
My canister came with a food grade plastic liner bag which helps keep food smells in and moisture out. Bear canisters are not waterproof, so this is a good idea.
Tip 1: when storing, turn your canister upside down, which puts the lid at the bottom.
Tip 2: make sure to stash your bear canister at least 150 ft (75 big paces) from your campsite before turning in for the night.
Cooking Gear
For my stove, I went basic again. Instead of a modern butane camping stove, I bought an old school alcohol stove with some methylated spirits (denatured alcohol) for fuel.
- This great YouTube video breaks down the three main stove options — ignore the host’s comments about fire bans, which are not accurate / the rest of the video is excellent
I didn’t like the stand that came with it so, after my first campout, I bought a stainless steel alcohol stove cross stand which sits on top of the burner. That works great.
I also picked up a wind screen which really helps speed up the boiling process — and therefore conserving fuel.
For my cook set, I chose a cheap Stanley Adventure Camp Cook Set which is basically a 24oz (700ml) kettle with 2 cups. That cost $14. I added a fancy titanium spork for $8.
This is a very cheap stove set-up. With this rig, I can cook one dinner and one breakfast, and have a healthy amount of fuel left over.
Colder temperatures affect fuel consumption so I’m keen to try my system in the snow. I suspect I’ll just squeak by.
Coffee Gear
I’m not a coffee snob but instant coffee is bullshit. This is an area where it’s easy for me to compromise by not compromising at all. I pack my grounds.
For a fresh brew, I use a foldable metal coffee drip. It’s a little heavy but it folds down almost flat. Some people prefer an AeroPress, which is maybe a little lighter, but also bulkier. As always, use whatever works for you.
For my drip system, I always pack two paper filters. I pack two just in case one gets messed up.
I bring one sachet of sweetener.
I drink black coffee, but you might want to add dairy or whatever dairy alternative you prefer.
Camping Water
Separately from the 2.5L water reservoir in my backpack, I pack a 1.5L bottle of tap water just for cooking. With a liter-and-a-half I can cook a dinner meal and a hot chocolate, plus breakfast and coffee the next morning. And I still have enough left for brushing my teeth after both meals.
If you camp near a water body, or are passing a spring or stream, pack some AquaTabs so you can collect and treat more water. Two tabs cleans my 1.5L bottle of water in 30 minutes.
You should absolutely treat any water you collect in the Catskills and Adirondacks. You might get away with not treating water once or twice but it’s a real gamble. Trust me, you do not want to deal with giardia parasites.
Campout Food
For my first outing, I tried a noodle bowl. I like spicy Korean noodles. They worked great. Next time, if I think I can get an egg into camp without cracking it, I’ll add one.
For my second campout, I tried a freeze-dried meal from Mountain House. Their Chicken Fried Rice was filling and tasty, but a bit bland. Next time, I’ll bring some extra salt and hot pepper flakes.
For dessert, a hot chocolate in the woods is a real treat.
I like those Oreo Snack Packs (two cookies per pack) too.
For breakfast: instant oatmeal with added chia seeds, raisins and nuts.
Add an apple and you’ll be set for a pretty big hike.
Personal Items
Hand wipes are essential. (They’re also great for wiping down your neck and feet before bed.)
A small bottle of hand sanitizer is also a necessity in these COVID times.
You’ll need toothpaste and a toothbrush. And you should spit into a small trash bag so as not to leave any minty smells in the woods. (Your minty spit will attract bears and other critters.)
Extra toilet paper is a good idea. You should always carry some TP, even on day hikes, but it’s worth checking your stash and making sure you have enough to get through 48 hrs. If you do poop, remember to dig a cat hole at least 6″ deep and cover it up when you’re done. Leave no trace.
After each meal, a napkin or two will go a long way with clean-up.
One time I camped out, I got indigestion. Very rare for me and it wasn’t much fun lying awake with Sudden Wilderness Heartburn Syndrome. It hasn’t been an issue since, but now I pack two antacids just in case.
Which makes me think: don’t forget to bring whatever regular medications you need.
Campout Clothing
If you feel like you want separate sleeping clothes, bring them. I prefer to cut weight.
I just put on the next day’s tee-shirt before climbing into bed.
Fresh underwear, obviously.
But don’t forget fresh socks too.
Shoulder Season Considerations
When the temperature is forecast to be near freezing, I will pack a long sleeve tee-shirt to sleep in. When the temps dip, basic layering does a lot of additional work in terms of keeping you warm. It can push the temperature rating of your sleeping bag down quite a bit.
If your backpack doesn’t already have an emergency wool or synthetic hat, get one in there now. I was grateful for mine one night.
Think about gloves. If your hands tend to get cold, definitely bring a pair.
What Not to Bring on Your First Campout
If you’re soloing, you have to carry everything yourself. It makes sense to cut as much weight as possible.
I brought my Kindle on several campouts but, so far, I haven’t used it even once. I‘m either too tired or too excited to concentrate. From now on, I’m leaving it behind. (Maybe on longer trips it would be a comfort but for an overnight it’s really not worth the weight.)
Bringing too much food is a constant issue for me. Even a few snacks or treats adds up a lot of unnecessary weight. Weight + distance = tiredness. Try to strip it down as much as possible, even as you account for your increased energy needs on hiking days.
Camp footwear (flip flops or whatever) — I’m currently in Camp No. Maybe in the dog days of summer it would be nice…
On my last campout, I brought a hoodie for camp. Dumb! First of all: cotton. Dumb! Second of all: I already had a great puffy in my backpack. Dumb!
Maybe there’s something in your pack that really doesn’t need to be in there. Without compromising your safety, every ounce you can shed is a helpful ounce to shed.
Final Thought
I hope this gives you a solid list of things to think about for your first campout. There’s a lot to consider. There’s a lot of planning and prepping. But you’ll learn a ton by just doing it.
Below, feel free to let me know how I did with these recommendations — and how you did on your first campout!
Further Reading
- 9 Campsite Selection Tips — SectionHiker with more great info
- 50 Safety Tips for Traveling Alone — Independent Wolf with lots of knowledge and tips to help you get there, and back, in one piece
- Budget Backpacking Gear List — Dixie has a great talk-through of inexpensive backpacking gear for noobs
- Catskills First Time Backpacker Seeking Advice — DSettahr has a great reply in this thread with lots of info about overnights in the Catskills
- Camping for Beginners — REI has a solid primer on the topic
- How to Pick a Campsite — The Leave No Trace people have a sweet video with some great tips for picking a backcountry location to set up camp
- Camping in the Catskills — VisitTheCatskills has some good links for camping and glamping (you know, if you want to wuss out)
- Andrew Skurka’s Guyling System for Tents — you need to read this, I need to read this
- Finally, the DEC has a great resource for primitive camping in the Catskills and Adirondacks which definitely deserves your eyeballs
What Next?
Keep an eye on the camping articles on this site. That section will grow over time as I do more, and learn more about, camping in the Catskills.
If you don’t want to monitor the site, sign up for the newsletter — you’ll get great content in your mailbox, and it’s totally free.
Google “solo camping checklist” for more ideas. Always do your own research. One web article ain’t it.
If this information helps you out, or you have comments, let me know below. I tried to be comprehensive but I’m keen to improve this resource…
Thank you for reading!